Are Single Handle Side Sprayer Faucets Outdated? - Pfister Faucet

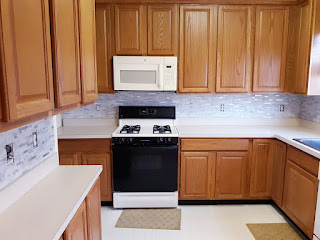
We finally replaced our broken kitchen faucet last week. By we, I mean the plumber.  The handle on our kitchen faucet had been leaking for quite some time, but we put off replacement for I don't know why.  We just kept wiping up the small puddle that appeared every time we didn't shut off the handle just right. The unit was 12 years old which is probably longer than most people would live with a certain model before upgrading.

But I was quite happy with what we already had. If we could have fixed it, I would have been quite satisfied. My mother would never get rid of something just because it was outdated. I wasn't raised with that luxury. Anyway, this unit wasn't repairable. The clincher came when the handle completely broke off and we could see the broken inner workings. That was it! 

I scrolled the internet for hours looking for a replacement faucet. The thing is, the model that I had - a Single Handle Side Sprayer Faucet - is apparently going out of style. Newer faucets include pull-down and touchless features. I was hard-pressed to find the exact same model as my old faucet. 


Eventually, I found a few models that would fit the three holes in our countertop without making any new cuts. They are:

  1. Sarana Model #W5155C 
  2. Pfister Model #LF-WK1-680S 
  3. Moen Part # 8138   

None of these models were available in-store, so we ordered online. We chose the Pfister model. I really wanted to avoid a big project. In fact, I was hoping that this would be a DIY, but we didn't have the proper tools.  Luckily, we found a local plumber who came at a moments notice and did a fabulous job! 

We're back in business! That reminds me. I have to leave the plumber a favorable review!


Disclosure: Links may contain affiliates. When you buy through one of our links we will receive a commission. This is at no cost to you. Thank you for supporting Life on Greenwood and allowing me to continue to bring you valuable content.


Blue Blocker Eyeglasses For Eye Strain - Zinff Review


I love my new blue-blocker eyeglasses! With so much time spent on the computer, my eyes were really taking a beating. It's said that the blue light from our computer can cause strain after extended use. This is my first time owning a pair of blue blockers. I chose Zinff brand. I feel like I'm doing something to protect my eyes. You know, you only get two! 


Have you tried blue light blocker eyeglasses? The Zinff model I chose is Alvin Square Black Eyeglasses. They're great! They are lightweight and make me look so studious! I believe they really make a difference in how my eyes react to daily extended screen time. The exclusive coupon code is Caron30 (20% off lens, 50% off frame). If you try them, please let me know.


 Disclosure: Links may contain affiliates. When you buy through one of our links we will receive a commission. This is at no cost to you. Thank you for supporting Life on Greenwood and allowing me to continue to bring you valuable content.  

Under Sink Organization - Dollar Tree Hack


Dollar Tree is the perfect spot for getting everything you need to tackle that storage space under the kitchen sink. Stock up on plastic containers in various colors and sizes. These are excellent for corralling your various containers of cleaners, disinfectants, brushes and all those products you usually hoard under the sink.  I like the white containers because they're neutral and have a crisp look and work with any decor. 

Don't forget contact paper! You'll need this to line the base of your under sink area. Again, Dollar Tree has several designs.

While you're at it, pick up a few scrub brushes. Why not?  This won't break the bank. 

Dollar Tree even has those little adhesive hooks (like @Command Strips). These are great for hanging scrub brushes or rubber gloves on the inside of the cabinet or on the cabinet door. 

Complete your entire project for less than $10 using Dollar Tree products. Here's a shopping list:

  • 4 Storage bins       $4.00
  • Contact paper        $1.00
  • Scrub brush           $1.00
  • Rubber gloves       $1.00
  • Adhesive hooks     $1.00
I'm all good now that I've straightened out my space! Was this helpful? Let me know!


Disclosure: Links may contain affiliates. When you buy through one of our links we will receive a commission. This is at no cost to you. Thank you for supporting Life on Greenwood and allowing me to continue to bring you valuable content.

Active "Plus 60" Women's Fashion on a Budget


 Thrifting is my passion! I have a conservative style, so I gravitate toward fashion that is comfortable and modest. Recently, I found several pre-loved @Talbots blouses that I absolutely love! 

Each blouse can be worn with jeans, a blazer, tucked or tied.

A friend of mine said she wasn't fond of one of them, but I'm trying to win her over by styling it with pearls. How can she not like anything when adorned with a string of pearls? 

Anyway, these blouses, in my opinion, are perfect for the active "Plus 60" woman. 


Disclosure: Links may contain affiliates. When you buy through one of our links we will receive a commission. This is at no cost to you. Thank you for supporting Life on Greenwood and allowing me to continue to bring you valuable content.

Denim Jacket Fashion On a Budget - Walmart Review


Want to up your denim jacket game and not break the budget? Try Walmart! Yes, Walmart! Their Time and Tru Women's line has a new denim jacket that comes in Black Wash (what I'm wearing), Dark Wash, Medium Wash, and Sandstone Pink Wash to name a few. Cost $19.98 and runs in sizes XS to XXXL. Can you believe that? 


The jacket has slit side pockets and flap pockets on the chest. It has a little stretch to it and I love it! I found mine in-store, but you can also find them at walmart.com. Would you wear this jacket? Drop me a line and let me know.


Disclosure: Links may contain affiliates. When you buy through one of our links we will receive a commission. This is at no cost to you. Thank you for supporting Life on Greenwood and allowing me to continue to bring you valuable content.  

How to Install a Peel and Stick Tile Backsplash - Tic Tac Tiles


Your girl installed a whole peel and stick tile backsplash! I bought a townhouse back in 2004. It was a new build with mostly builder-grade amenities. Over the years I have painted a few rooms, but there are large sections of the house that remain untouched. You know that flat white paint that the builders use that catches every scuff? Well, I still have it.

So, I've decided to do a few upgrades, starting by adding a much needed kitchen backsplash. I decided to try peel and stick tiles. There are so many styles out there. Cost and ease of installation were important to me since I would be doing this project on my own. Another thing, this townhouse is not my primary residence and I really didn't want to make a huge investment at this time.

After searching the internet, I selected Tic Tac Tiles and they graciously sent me five samples from their peel and stick collection. I had a tough decision to make! I polled my social media followers for feedback on which way I should go. The response was overwhelmingly positive! I chose the Metallic Marble White peel and stick tile. Great decision!

So how did I do?


Tips - Things You Must Consider

  1. Clean your walls thoroughly with a degreaser. If you have stuck-on grease spots, use a steel wool pad or something similar to scrape off the gunk. A clean surface is a must in order to get maximum adhesion!
  2. Use the proper tools. Scissors, level, ruler or measuring tape and a pencil are about all you will need to install vinyl peel and stick. For more durable peel and stick tile like Metallic Marble White tiles, I would recommend a utility knife instead of scissors. 
  3. Before applying a sheet of tile to the wall, peel the paper backing half way. This will give you a little more control so the entire sheet of tile doesn't adhere to the wall before you have it properly lined up. It's really sticky! Slowly peel back the rest of paper covering as you adhere the tile to the wall. In the case of Metallic Marble White, one end of the sheet of tile simply interlocks and snaps into place. 

The Hard Part - Cutting Around Outlets

If you're working with vinyl tile, cutting around outlet covers should be pretty easy. Because the Metallic Marble White tiles is much thicker than vinyl, I used my utility knife to score the area that I wanted to cut. Then I used wire cutters to nip away at the tile until I had the results I needed.


The Good Part - No Grouting

I love my tile backsplash!  And the best part is, I did it myself! With Metallic Marble White peel and stick tiles, you get the look of real stone tile, without the hassle of grouting. I don't mind that at all! 


Next on my list?  Paint the kitchen cabinets!  Feel free to use my coupon code to order any tile from Tic Tac Tiles.

Use code: LIFEONGREENWOOD15 for 15% any tile style. Valid until 3/27/22 at midnight.                


 Disclosure: Links may contain affiliates. When you buy through one of our links we will receive a commission. This is at no cost to you. Thank you for supporting Life on Greenwood and allowing me to continue to bring you valuable content.                             

FEATURED POST

EASY HOMEMADE GRAVY RECIPE WITHOUT DRIPPINGS

Would you like to master the art of making homemade gravy without using any drippings? Everybody knows that gravy is not the easiest thing t...